 Kawasaki Z400 - Service manual > Brakes
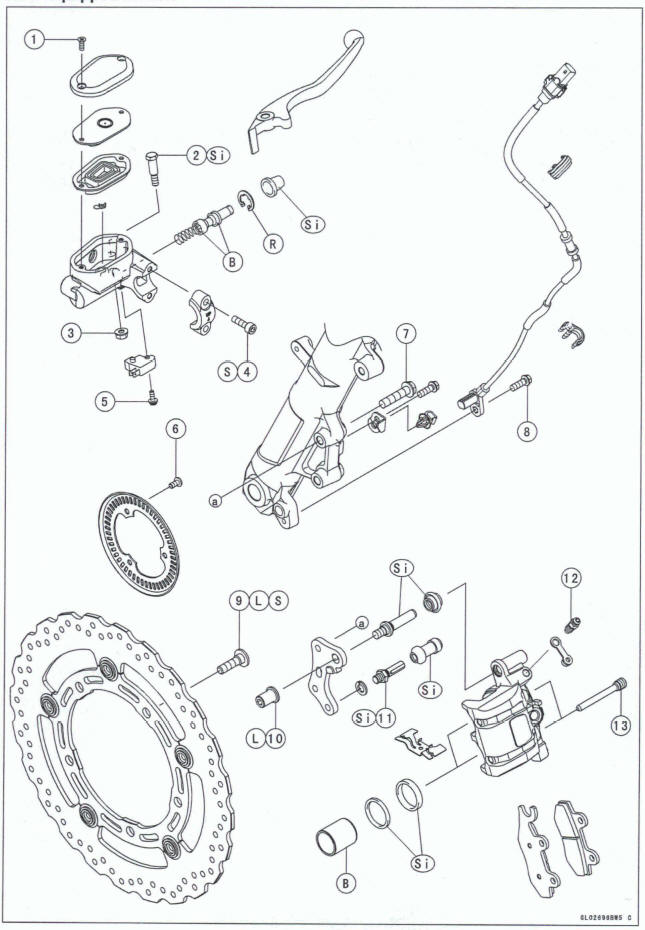
Exploded View
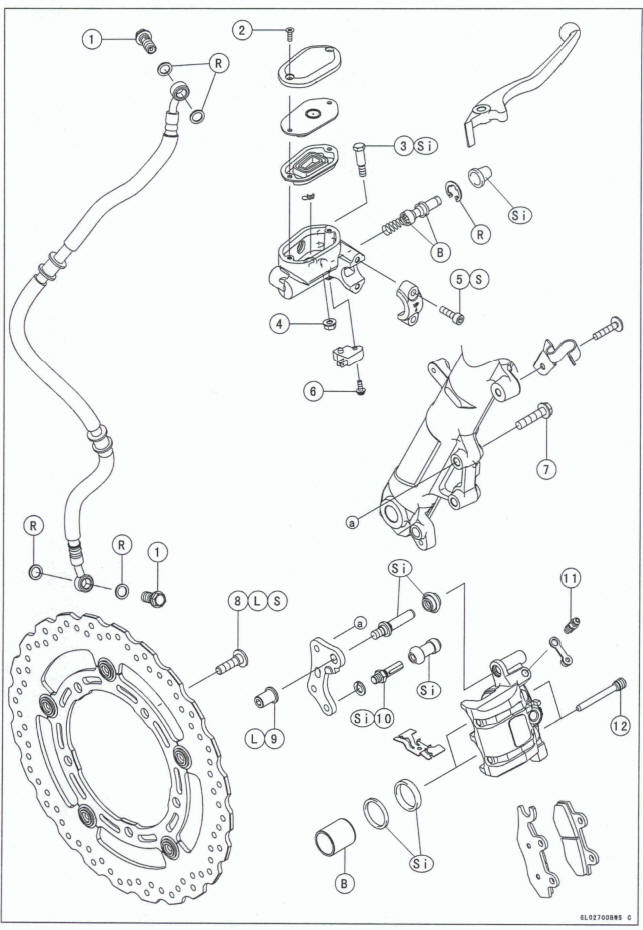
B: Apply brake fluid.
L: Apply a non-permanent locking agent.
R: Replacement Parts
S: Follow the specified tightening sequence.
Si: Apply silicone grease
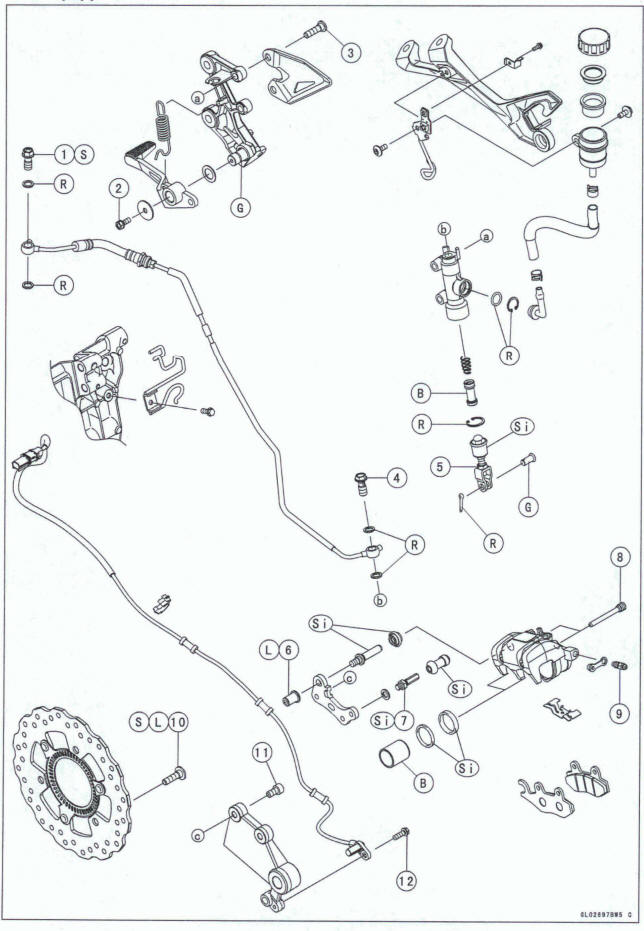
B: Apply brake fluid.
G: Apply grease.
L: Apply a non-permanent locking agent.
R: Replacement Parts
S: Follow the s-ed tightening sequence.
Si: Apply silicone grease.
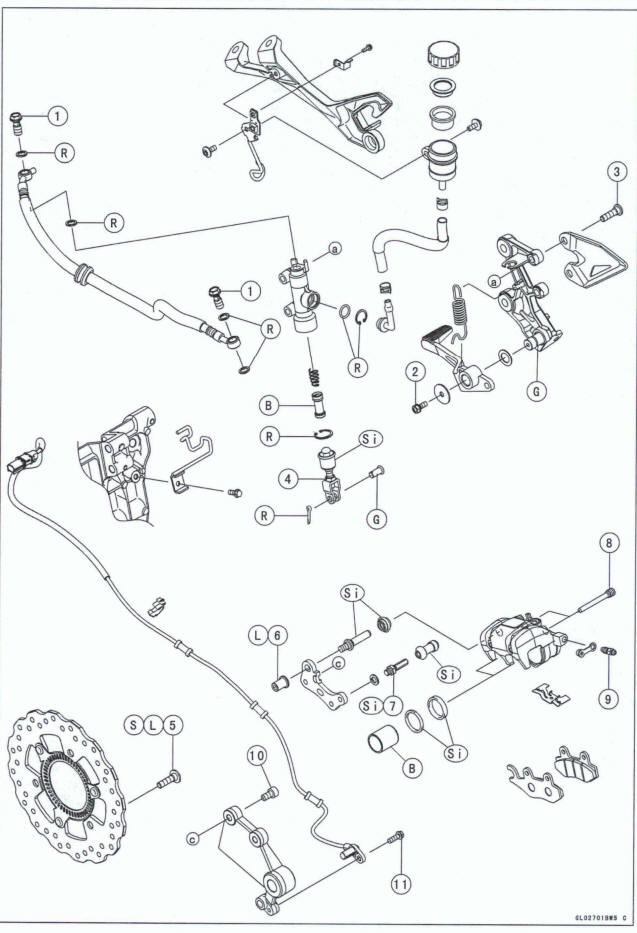
ABS Equipped Models
B: Apply brake fluid.
L: Apply a non-permanent locking agent.
R: Replacement Parts
S: Follow the specified tightening sequence.
Si: Apply silicone grease.
ABS Equipped Models
B: Apply brake fluid.
G: Apply grease.
L: Apply a non-permanent locking agent.
R: Replacement Parts
S: Follow the specified tightening sequence.
Si: Apply silicone grease.
NOTE
When disassembling the brake hose and pipe, disassemble them by the unit as shown in the exploded view.
ABS Equipped Models
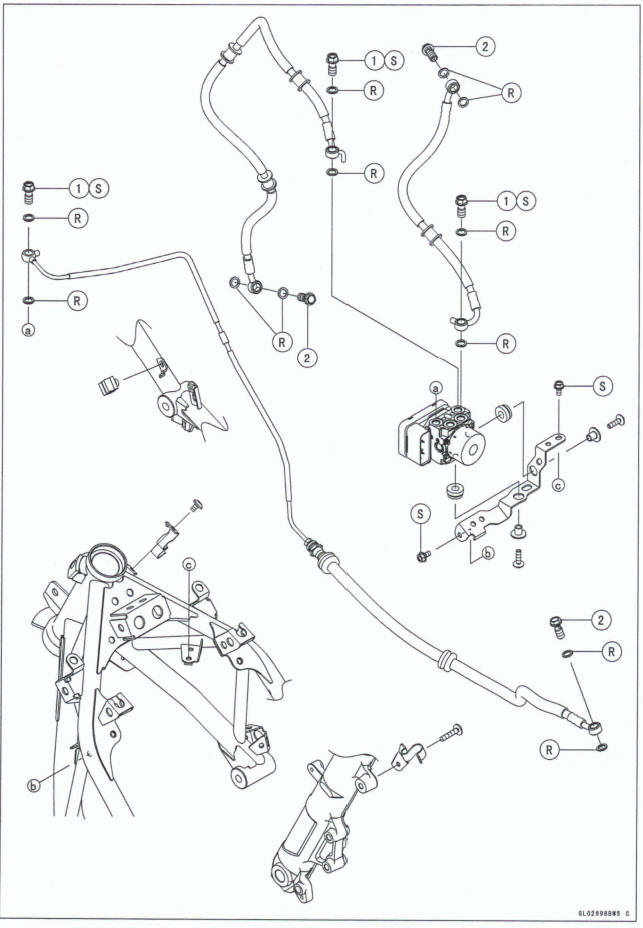

R: Replacement Parts
S: Follow the specified tightening sequence
NOTE
When disassembling the brake hose and pipe, disassembling them by the unit as shown in the exploded view.
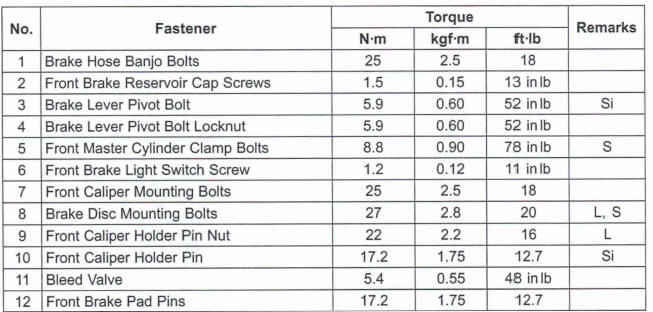
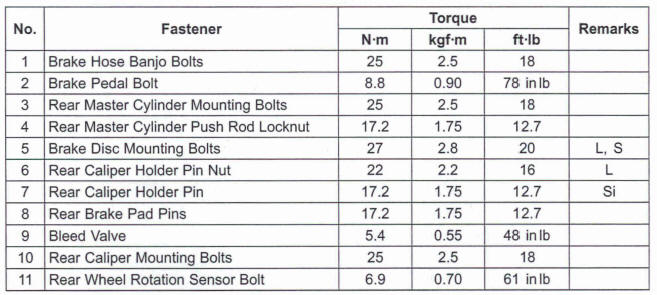
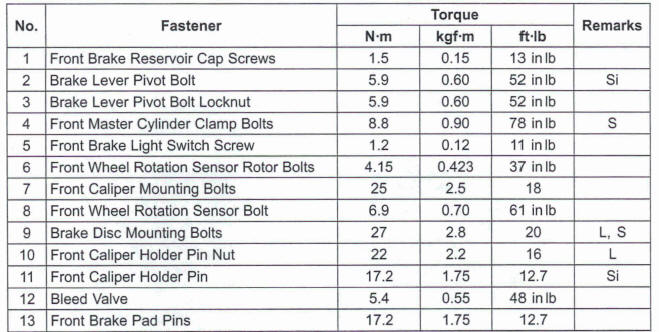
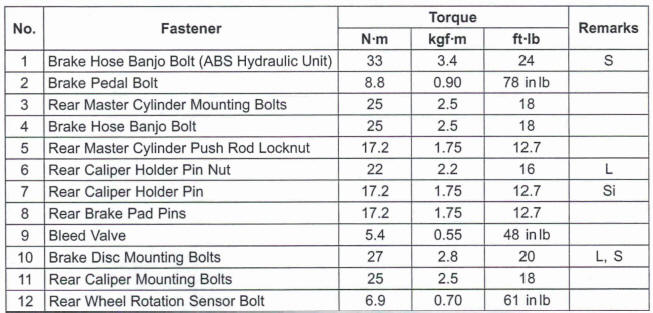
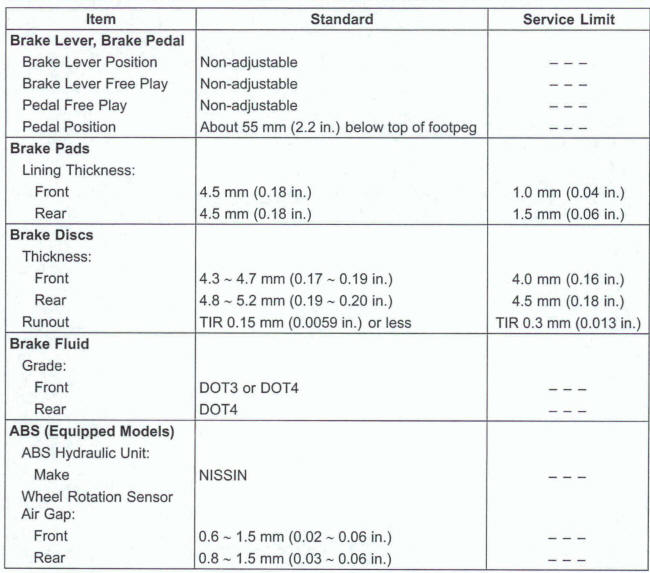
Specifications
Brake Pedal
Brake Pedal Position Inspection
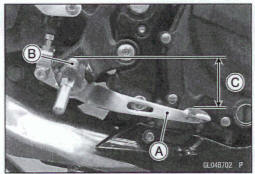
Check that the brake pedal [A] is in the correct position.
Footpeg [B]
Pedal Position Standard: About S!5 mm (2.2 in.) [C] below top of footpeg
*If it is incorrect, adjust the brake pedal position.
Brake Pedal Position Adjustment
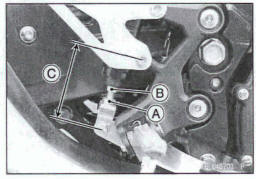
NOTE
Usually it is not necessary to adjust the pedal position, but always adjust it when push rod locknut has been loosened.
- Loosen the locknut [A] and turn the push rod with the hex head [B] to achieve the med pedal position.
*If the length [C] shown is 78 f 1 mm (3.07 f0.04 In.), the pedal position will be within the standard range.
- Tighten: Torque - Rear Master Cylinder Push Rod Locknut: 17.2 N-m (1.75 kgf*m, 12.7 ft-lb
- Check the brake light switch operation (see Brake Light Switch Operation Inspection in the Periodic Maintenance chapter).
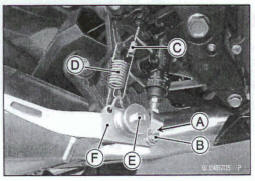
Brake Pedal Removal
- Remove the bolt [A].
- Loosen the banjo bolt [B] and tighten it loosely to prevent the fluid spillage (ABS Equipped Models).

NOTICE
Brake fluid quickly damage painted plastic surfaces; any spilled fluid should be completely washed away Immediately
- Remove the right front footpeg bracket bolts [C].
- Remove the banjo bolt and din& the brake hose (ABS Equipped Models).
- Turn the right front footpeg bracket inside out.
- Remove: Cotter Pin [A] Joint Pin [B] Rear Brake Light Switch Spring [C] Return Spring [D]
- Remove the brake pedal bolt [E] and brake pedal [F]
Brake Pedal Installation
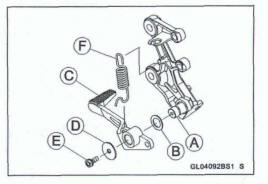
- Apply grease to the pivot shaft [A] and install the washer [B].
- Install: Brake Pedal [C] Washer [D]
- Tighten: Torque - Brake Pedal Bolt [E]: 8.8 N-m (0.90 kgf-m, 78 in*lb)
- Hook: Rear Brake Light Switch Spring Return Spring [F]
- Replace the cotter pin with a new one.
- Insert the joint pin from the outside.
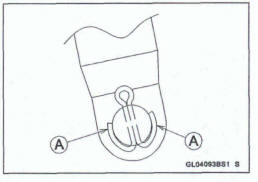
- Insert the cotter pin and bend the pin ends [A].
- Install the right front footpeg bracket, and tighten the bolts.
Torque - Front Footpeg Bracket Bolts: 25 N-m- (2,.5 kgf*m,18 ft*lb)
- Check the brake pedal position (see Brake Pedal Position Inspection).
- Install the removed parts (see appropriate chapters).
See also:
 Kawasaki Z400 - Service manual > Sprocket, Coupling
Engine Sprocket Removal Remove: Shift Lever Clamp Bolt [A] Shift Lever [B] Remove: Engine Sprocket Cover Bolts [A] Engine Sprocket Cover [B] Flatten out the bended washer [A]. Remove the engine sprocket nut [B] and washer.
Kawasaki Z400 - Service manual > Calipers
Front Caliper Removal Loosen the banjo bolt [A] at the brake hose lower end, and tighten it loosely. Remove the caliper mounting bolts [B] and caliper [C]. Remove the banjo bolt to disconnect the brake hose [D] from the caliper (see Brake Hose Removal/Installation).
 Benelli Imperiale 400
 BMW F900XR
 Honda CB500X
 KTM 390 Adventure
 Triumph Street Triple S
 Yamaha MT-03
 Kawasaki Z400
 Triumph Street Triple S
 Yamaha MT-03