 Kawasaki Z400 - Service manual > Oil Pump
Oil Pump Removal
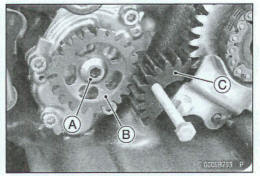
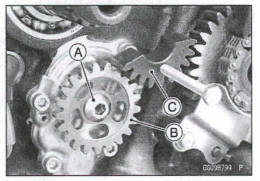
- Remove: Clutch (see Clutch Removal in the Clutch chapter) Oil Pump Driven Gear Bolt [A] Oil Pump Driven Gear [B] Hold the gear steady with the gear holder [C].
Special Tool - Gear Holder. 57001-1602
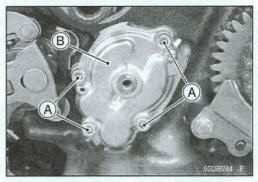
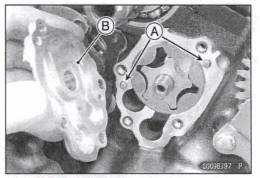
- Remove: Oil Pump Cover Bolts [A] Oil Pump Cover [B]
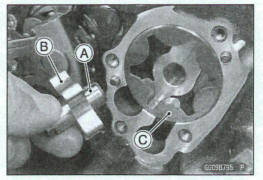
- Remove: Oil Pump Shaft [A] Inner Rotor [B] Pin Outer Rotor [C]
Oil Pump Installation
- Apply molybdenum disulfide oil solution Oil Pump Shaft [A] Inner Rotor [B] Outer Rotor [C]
- Assemble: Oil Pump Shaft Pin [D] Inner Rotor
Fit the groove of rotor and the pin.
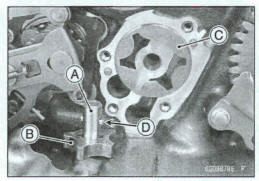
- Install the outer rotor into the crankcase.
- Install the inner rotor and shaft.
- Be sure to install the dowel pins [A]
- Install the oil pump cover [B].
- Apply a non-permanent locking cover bolts.
- Tighten: Torque - oil Pump Cover Bolts: 7.0 N*m (0.71 kgf*m, 62 In-lb)
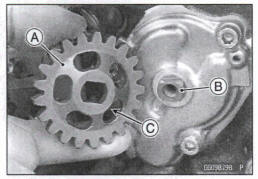
- Install the oil pump driven gear [A] onto the oil pump shaft [B] with its projecting side [C] Facing to the oil pump.
- Apply a non-permanent locking agent to the threads of W the oil pump driven gear mounting bolt [A].
- Hold the oil pump driven gear [B] steady with the clutch holder [C], and tighten the dl pump driven gear bolt.
Special Tool - Gear Holder: 57001 -1 602 Toque - Oil Pump Driven Gear 8dt: 9.8 Nm (1.0 kgf*m, 87 In*lb)
Oil Pressure Measurement
Remove the right lower fairing (see Lower Fairing Removal in the Frame chapter).
Remove the oil passage plug [A].
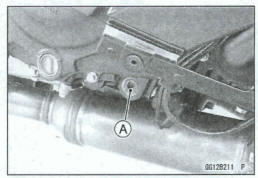
- Attach the adapter [A] and gauge [B] to the plug hole.
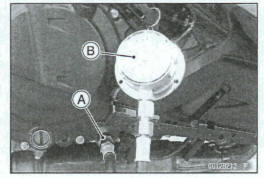
Special Tools- Oil Pressure Gauge, 10 kgf/cm²: 57001 -164
Oil Pressure Gauge Adapter, PT 318: 57001 -1233
- Start the engine and warm up the engine.
- Run the engine at the specified speed, and read the oil pressure gauge.
*If the reading is much lower than the standard, check the oil pump, relief valve, and/or crankshaft bearing insert wear immediately.
*If the Wing is much higher than the standard, check the oil passages for dogging.
Oil Pressure Standard: 157 - 206 kPa (1.60 - 2.10 kgf/cm², 22.8 - 29.9 psi) @4 000 r/min (rpm), Oil Temperature 90ºC (194OF)
- Stop the engine.
- Remove the oil pressure gauge and adapter.
Apply a non-permanent locking agent to the dl passage plug, and install it.
Tighten: Toque - oil Passage Plug: 20 N*m (2.0 kgf*m, 15 ft*lb)
Install the right lower fairing (see Lower Fairing Installation in the Frame chapter).
Oil Pressure Switch Removal
- Drain: Engine Oil (see Engine Oil Change in the Periodic Maintenance chapter)
- Remove: Right Lower Fairing (see Lower Fairing Removal in the Frame chapter) Switch Cover [A] Switch Terminal Bolt [B] Oil Pressure Switch [C]
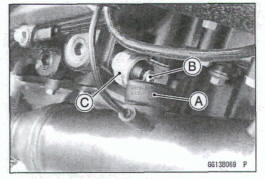
Oil Pressure Switch Installation
- Clean off any oil or dirt and apply silicone sealant to the threads of the oil pressure switch and tighten it.
Sealant - Liquid Gasket, TB1211: 56019-120
Torque - OH Pressure Switch: 15 N-m (1.5 kgf-m, 11 R-lb)
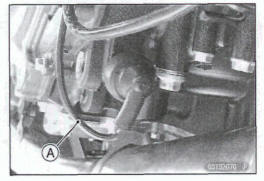
- Apply grease to the both sides of the switch lead terminal.
- Connect the switch lead [A] to the switch terminal as shown
NOTE
Apply a small amount of grease to the terminal so that grease should not dose two breather holes [A] for switch diaphragm.
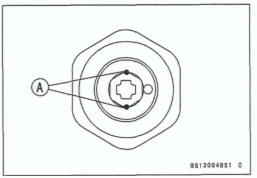
- Install: switch Cover Right Lower Fairing (see Lower Fairing Installation in the Frame chapter)
- Fill the engine with engine dl (see Engine Oil Change in the Periodic Maintenance chapter).
Oil Pipe Removal
- Remove: Clutch (see Clutch Removal in the Clutch chapter) Oil Pipe Bolt [A] oil Pipe [B]
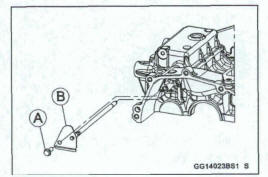
Oil Pip Installation
- Installation is the reverse of removal.
- Tighten: Toque -Oil Pipe Bolt: 9.8 N-m (1.0 kgf-m, 87 in*lb)
See also:
 Kawasaki Z400 - Service manual > Engine Oil and Oil Filter
Oil Level Inspection WARNING Vehicle operation with insufficient, deteriorated, or contaminated engine oil will cause accelerated wear and may result in engine seizure, accident, and Injury. Check the oil level before each use and change the oil and fitter according to the periodic maintenance chart.

 Benelli Imperiale 400
 BMW F900XR
 Honda CB500X
 KTM 390 Adventure
 Triumph Street Triple S
 Yamaha MT-03
 Kawasaki Z400
 Triumph Street Triple S
 Yamaha MT-03