 Kawasaki Z400 - Service manual > Fairings
Lower Fairing Removal
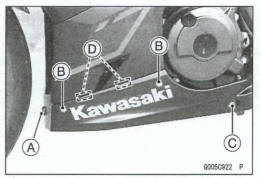
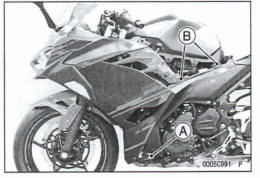
- Remove: Quick Rivet [A] Bob and Washers [B] Bolt and Collar [C]
- Pull the lower part of lower fairing to out side, and clear the tabs [D].
- Remove the lower fairing.
Lower Fairing Installation
- Insert the tabs [A] on the lower fairing into the slots [B] on the middle fairing.
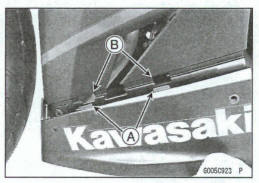
- Lift up the rear part of the lower fairing while installing the removed parts.
- Tighten the bolts following the tightening sequence [1~3]
- Install the quick rivet [A]
Lower Inner Fairing Removal
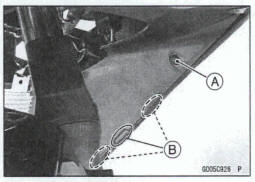
- Remove the bolts [A].
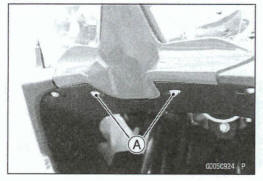
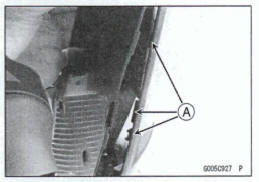
- Remove the quick rivets [A] (both sides).
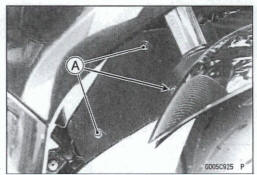
- Pull the lower inner fairing to dear the tabs [B] on both sides, and remove the lower inner fairing.
Lower Inner Fairing Installation
- Installation is the reverse of removal.
- Insert the lower inner fairing to the tabs [A] on the middle fairing.
Middle Fairing Removal
- Remove: Lower Fairings (see Lower Fairing Removal)
Lower Inner Fairing (see Lower Inner Fairing Removal)
Side Covers (Side Cover Removal)
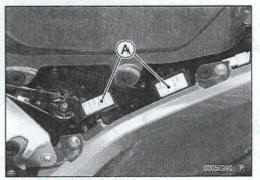
Fuse Boxes [A] (Left Side Only)
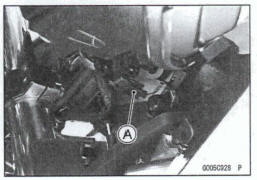
- Disconnect the front turn signal light lead connector [A].
- Remove the bolt [A].
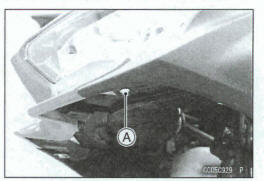
Remove: Bolt [A] and Washer Quick Rivet [B]
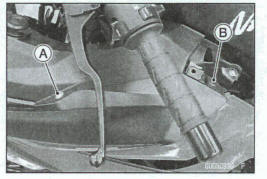
- Remove the bolts [A] rand washers.
- Pull the middle fairing outward to dear the projections [B] and tab [C].
- Remove the middle fairing.
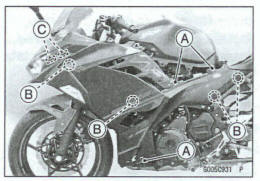
Middle Fairing Installation
- Installation is the reverse of removal.
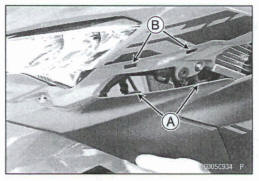
- Check that the dip nut [A] and grommets [B] are in place.
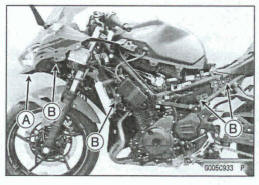
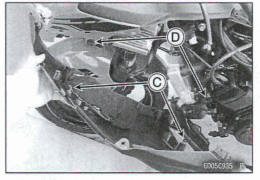
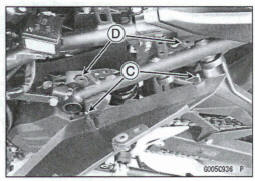
- Insert the tabs [A] into the slots [B].
- Insert the projections [C] into the grommets [D].
- Push the front part [A] of the middle fairing while installing the bolt [B].
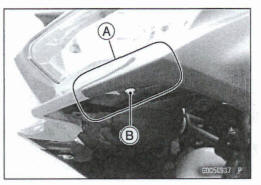
- Tighten the lower bolt [A] first, and then tighten the upper bolts [B].
- Install the removed parts (see appropriate chapters
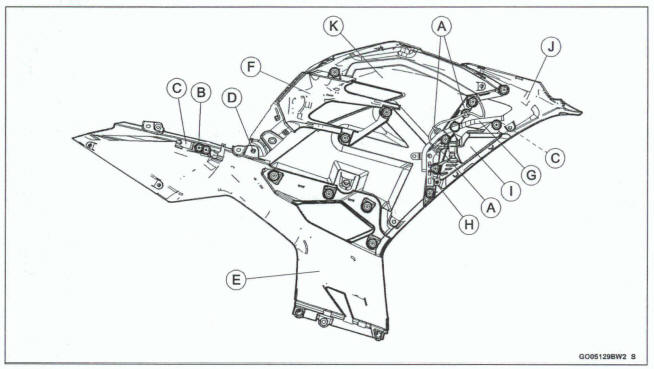
Middle Fairing Disassembly/Assembly
- Open the damps [A].
- Remove:
Screws [B]
Brackets [C] (Left Side Only)
Bolt and Nut [D]
Lower Middle Fairing [E]
Fin [F]
Pad [G] (Left Side Only)
Bracket [H]
Turn Signal Light [I]
Turn Signal Light Cover [J]
Upper Middle Fairing [K]
- Installation is the reverse of removal.
Upper Fairing Removal
- Remove: Middle Fairings (see Middle Fairing Removal)
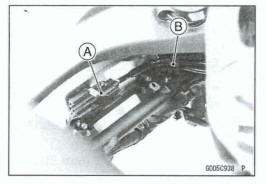
- Disconnect the headlight lead connector [A].
- Open the damp [B].
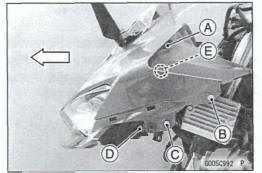
- Remove: Quick Rivet [A] (Both Sides) Saw [B] (Both Sides) Bolt and Washer [C] (Both Sides) Headlight Mounting Bolt [D] (Both Sides)
- Move the upper fairing forward to remove it from the grommet [E] (both sides).
Upper Fairing Installation
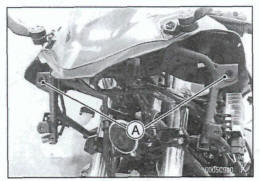
- Installation is the reverse of removal.
- Check that the grommets [A] are in place.
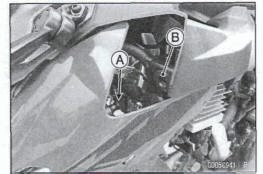
- Insert the projection [A] into the grommet [B] (both sides).
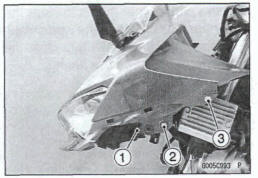
- Tighten the bolts and screws following the tightening sequence [1~3]
Headlight Mounting Bolt [1] (Both Sides ) Bolt and Washer [2] (Both Sides) Screw [3] (Both Sides)
- Run the cable, leads and harness correctly (see Cable, Wire, and Hose Routing section in the Appendix chapter).
- Install the removed parts (see appropriate chapters).
Windshield Removal/ Installation
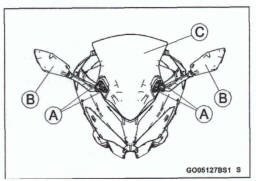
- Remove: Rear View Mirror Bolts [A] Rear View Mirrors [B] Windshield [C]
- Installation is the reverse of removal.
- Tighten:
Torque - Rear View Mirror Bolts: 8.8 N*m (0.90 kgf*m, 78 in-lb)
Upper Inner Fairing Removal
- Remove: Windshield (seee Windshield Removal/Installation) Upper Fairing (see Upper Fairing Removal)
- For accessory socket equipped models, disconnect the accessory socket connectors [A ].
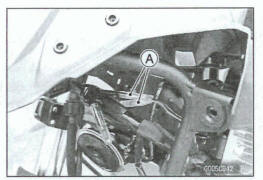
Slide the dust cover [A], and disconnect the meter connector [B]
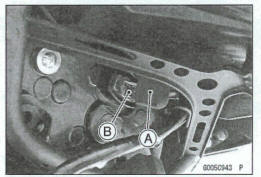
- Remove the bolt [A] and washer (both sides).
- Pull up the upper inner fairing to dear the projection [B ] (both sides).
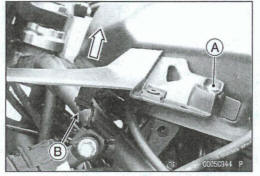
- Pull the upper inner fairing to dear the projections [A].
- Clear the holes [B] from the windshield mounting portions.
- Pull the upper inner fairing to dear the projection [C].
Remove the upper inner fairing.
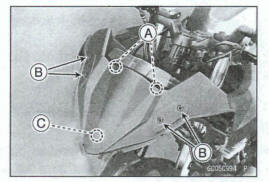
Upper Inner Fairing Installation
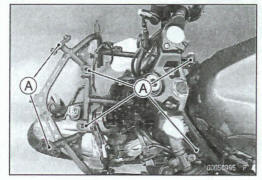
- Installation is the reverse of removal.
- Check that the grommets [A] are in place.
- Check that the grommet [A] is in place.
- Insert the grommet to the projection [B].
- Fit the holes [C] to the windshield mounting portions [D].
- Insert the projections [E] to the grommet [F].
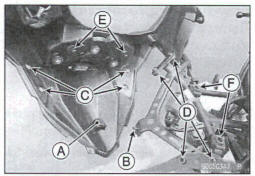
- Insert the projection [A] to the grommet [B] (both rider).
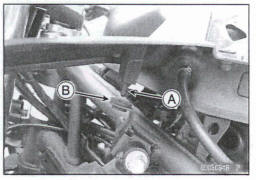
Upper Inner Fairing Installation
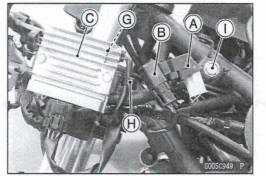
Remove: Upper Inner Fairing (see Upper Inner Fairing Removal) Turn Signal Relay [A] Accessory Relay [B] (Equipped Models) Regulator/Rectifier [C] (see Regulator/Rectifier Removal in the Electrical System chapter) Vehicle-down Sensor [D] (see Vehicle-down Sensor Removal in the Electrical System chapter) Turn Signal Light Lead Connectors [E] Coolant Reserve Tank [F] (see Coolant Reserve Tank Removal) Head Light Lead Connector [G]
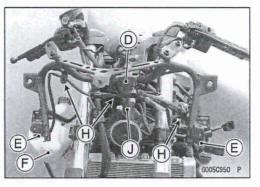
- Open the damps [H].
- Remove: Upper Fairing Bracket Bolt [I] (Both Sides) Upper Fairing Bracket Nut [J], Bolt and Spacer Upper Fairing Bracket
Upper Fairing Bracket Installation
- Replace the upper fairing bracket nut [1]with a new one.
- Install: Upper Fairing Bracket [A] , Spacer [B] Bolt [C]
- Tighten the upper Wing bracket nut and bolts following the specified tightening sequence [1 - 3].
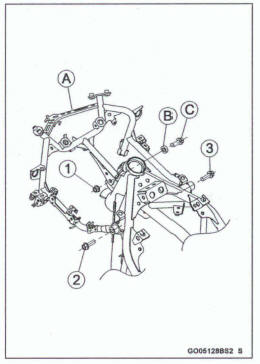
Torque - Upper Fairing Bracket Nut: 34 Nm (33 kgf*m, 25 ft*lb)
Upper Fairing Bracket Bolts: 34 N*m (3.5 kgf-m, 25 ft*lb)
- Install the removed parts (see appropriate chapters).
Covers
Side Cover Removal
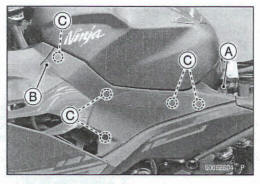
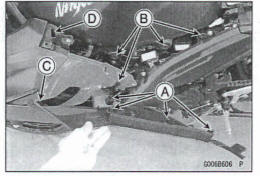
- Remove: Front Seat (see Front Seat Removal) Bolt [A] Bolt [B] and Washer
- Pull the side cover outward to clear the projections [C].
Side Cover Installation
- Check that the grommets [A] are in place.
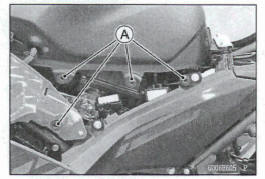
Insert the projections [A] into the grommets [B].
Insert the projection [C] into the hole [D]
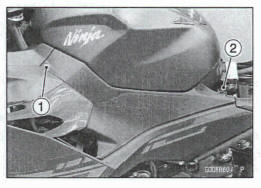
- Tighten the bolts following the specified tightening sequence [1 - 2].
See also:
 Kawasaki Z400 - Service manual > Seats
Rear Seat Removal Insert the ignition key [A] into the seat lock. Turn the key clockwise, and pull up the front part of rear seat [B] Remove the rear seat forward.
 Kawasaki Z400 - Service manual > Seat Covers
Side Seat Cover Removal Hook [A] Projections [B] Remove: Mile Fairings (see Middle Fairing Removal) Screws [A] (Left Side Only) Plate [B] (Left Side Only) Clear the cable [C] from the bracket [D] (Left Side Only). Remove: Bolts [A] and Washers Pull the side seat cover outward to dear the projections [C]. Pull the side seat cover backward to clear the hook [D]

 Benelli Imperiale 400
 BMW F900XR
 Honda CB500X
 KTM 390 Adventure
 Triumph Street Triple S
 Yamaha MT-03
 Kawasaki Z400
 Triumph Street Triple S
 Yamaha MT-03