 Yamaha MT-03 - Owner's Manual > Indicator lights brightness control mode
- Indicator lights brightness: This function allows you to adjust the brightness of the indicator lights to suit the outside lighting conditions.
To adjust the brightness of the indicator lights
1. Turn the key to "ON".
2. Push the "SELECT" button to select ODO meter mode, and then push the "RESET" button for at least five seconds.
3. Release the "RESET" button, and then select the desired lighting brightness level by pushing the "RESET" button.
Anti-theft alarm (optional)
This motorcycle can be equipped with an optional anti-theft alarm by a Yamaha dealer. Contact a Yamaha dealer for more information.
Handlebar switches
Left
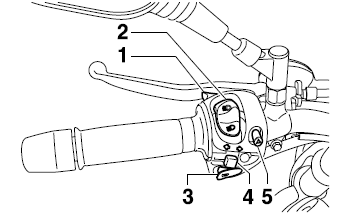
- Pass switch "
 "
" - Dimmer switch "
 /
/
 "
" - Horn switch "
 "
" - Turn signal switch "
 "
" - Hazard switch "
 "
"
Right
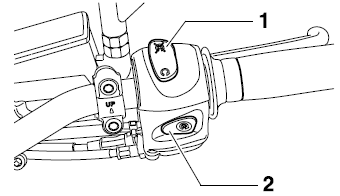
- Engine stop switch "
 /
/ "
" - Start switch "
 "
"
Pass switch ""
Press this switch to flash the headlight.
Dimmer switch "/"
Set this switch to "" for the
high beam and to "" for the low beam.
Horn switch ""
Press this switch to sound the horn.
Turn signal switch ""
To signal a right-hand turn, push this switch to " ".
To signal a left-hand turn, push this switch to "
".
To signal a left-hand turn, push this switch to " ".
When released, the switch returns to the center position. To cancel the turn
signal lights, push the switch in after it has returned to the center position.
".
When released, the switch returns to the center position. To cancel the turn
signal lights, push the switch in after it has returned to the center position.
Engine stop switch "/"
Set this switch to "" before
starting the engine. Set this switch to ""
to stop the engine in case of an emergency, such as when the motorcycle
overturns or when the throttle cable is stuck.
Start switch ""
Push this switch to crank the engine with the starter.
Hazard switch ""
With the key in the "ON" or  position, use this switch to turn on the hazard lights (simultaneous flashing of
all turn signal lights).
position, use this switch to turn on the hazard lights (simultaneous flashing of
all turn signal lights).
The hazard lights are used in case of an emergency or to warn other drivers when your vehicle is stopped where it might be a traffic hazard.
CAUTION: Do not use the hazard lights for an extended length of time with the engine not running, otherwise the battery may discharge.
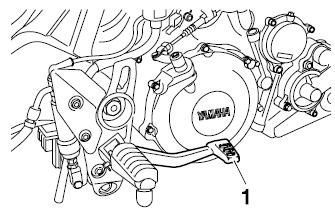
Clutch lever
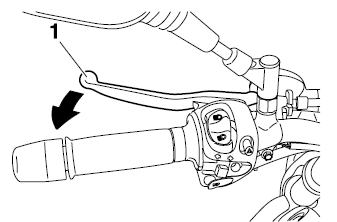
- Clutch lever
The clutch lever is located at the left handlebar grip. To disengage the clutch, pull the lever toward the handlebar grip. To engage the clutch, release the lever. The lever should be pulled rapidly and released slowly for smooth clutch operation.
The clutch lever is equipped with a clutch switch, which is part of the ignition circuit cut-off system.
Shift pedal
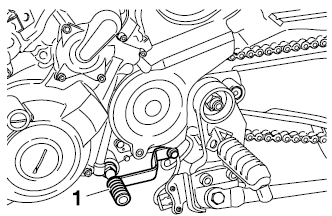
- Shift pedal
The shift pedal is located on the left side of the engine and is used in combination with the clutch lever when shifting the gears of the 5-speed constant- mesh transmission equipped on this motorcycle.
Brake lever

- Brake lever
- Position adjusting dial
- Arrow mark
- Distance
The brake lever is located at the right handlebar grip. To apply the front brake, pull the lever toward the handlebar grip.
The brake lever is equipped with a position adjusting dial. To adjust the
distance between the brake lever and the handlebar grip, turn the adjusting dial
while holding the lever pushed away from the handlebar grip. Make sure that the
appropriate setting on the adjusting dial is aligned with the " "
mark on the brake lever.
"
mark on the brake lever.
Brake pedal
- Brake pedal
The brake pedal is on the right side of the motorcycle. To apply the rear brake, press down on the brake pedal.
Fuel tank cap
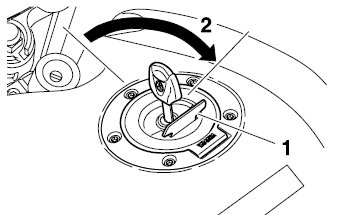
- Lock cover
- Open
To open the fuel tank cap
Open the fuel tank cap lock cover, insert the key into the lock, and then turn it 1/4 turn clockwise. The lock will be released and the fuel tank cap can be opened.
To close the fuel tank cap
1. Push the fuel tank cap into position with the key inserted in the lock.
2. Turn the key counterclockwise to the original position, remove it, and then close the lock cover.
NOTE: The fuel tank cap cannot be closed unless the key is in the lock. In addition, the key cannot be removed if the cap is not properly closed and locked.
WARNING Make sure that the fuel tank cap is properly closed before riding.
See also:
 Yamaha MT-03 - Owner's Manual > Multi-function meter unit
Speedometer Tachometer Clock Odometer/Tripmeters/Fuel reserve tripmeter "SELECT" button "RESET" button
Yamaha MT-03 - Owner's Manual > Fuel
Fuel tank filler tube Fuel level Make sure that there is sufficient fuel in the tank. Fill the fuel tank to the bottom of the filler tube as shown.
 Benelli Imperiale 400
 BMW F900XR
 Honda CB500X
 KTM 390 Adventure
 Triumph Street Triple S
 Yamaha MT-03
 Kawasaki Z400
 Triumph Street Triple S
 Yamaha MT-03